Home > Apple Music Tips > Get Apple Music for Free
How to Get Apple Music for Free
- Deutsch
- Nederlands
Just like other streaming services, Apple Music has its own subscription plans that are tailored for its users. But for many people, paying every month can add up to a lot of money. If you don't renew, though, you won't be able to access Apple Music anymore, which is quite the pickle.
So, what can you do if you're on a tight budget or just tired of paying for subscriptions? Today, we're going to share some tips on how to get Apple Music for free. Let's find out how you can get Apple Music for free forever, without having to pay a monthly fee.
Method 1: Via Apple ID (1 Month)
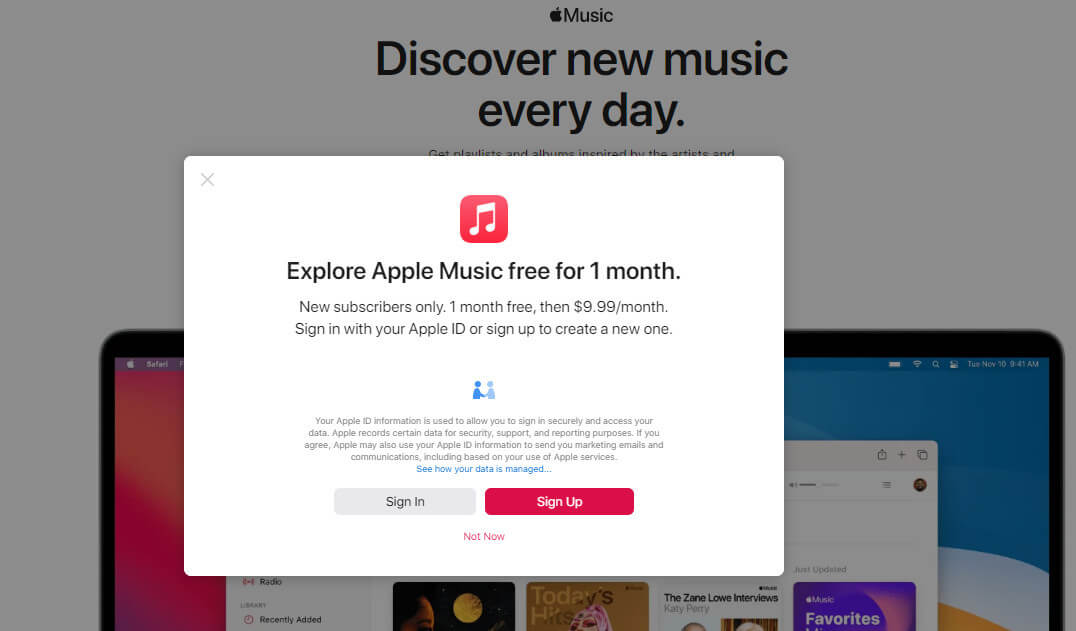
If you’ve never tried Apple Music before, you are able to get one month automatically free of charge. Prior to February 2022, this free trial lasted for three months.
To get this free trial, visit Apple Music’s website and choose "Try it free" in the top-right corner. Sign in with an existing Apple ID or create a new Apple ID. And click "Try it free" on any of the Voice, Student, Individual and Family plan options. After you claim the free account, you can enjoy up to 100 million songs, exclusive playlists, and radios on your iPhone, iPad, iPod, Android, PC, or Mac with no limitations.
You can get free Apple Music with this method. But after a trial expires, your Apple Music free account will be switched to a paid one. If you don't want to pay for Apple Music, you must make sure to cancel your subscription before it automatically renews. To do this on an iPhone, just go to Settings and click on the section at the top with your Apple ID. Next tap on Subscriptions and find the one you want to cancel. Then tap on Cancel Subscription at the bottom of the page.
Method 2: Via Shazam (2 Months)
There is another way to get free Apple Music songs on iOS devices and Android. Shazam is offering a free two-month Apple Music trial via the Shazam app(Shazam is a music identification service owned by Apple). Even if you have previously tried Apple Music for 1 month and are a lapsed subscriber, you can still take advantage of Shazam’s two-month free trial. All you need to do is download Shazam to your iPhone, iPad or iPod touch. You don’t even need to get the app to identify the song playing. You can find the Limited Time Only offer under your Recent Shazams. Follow these steps below to get a free trial.
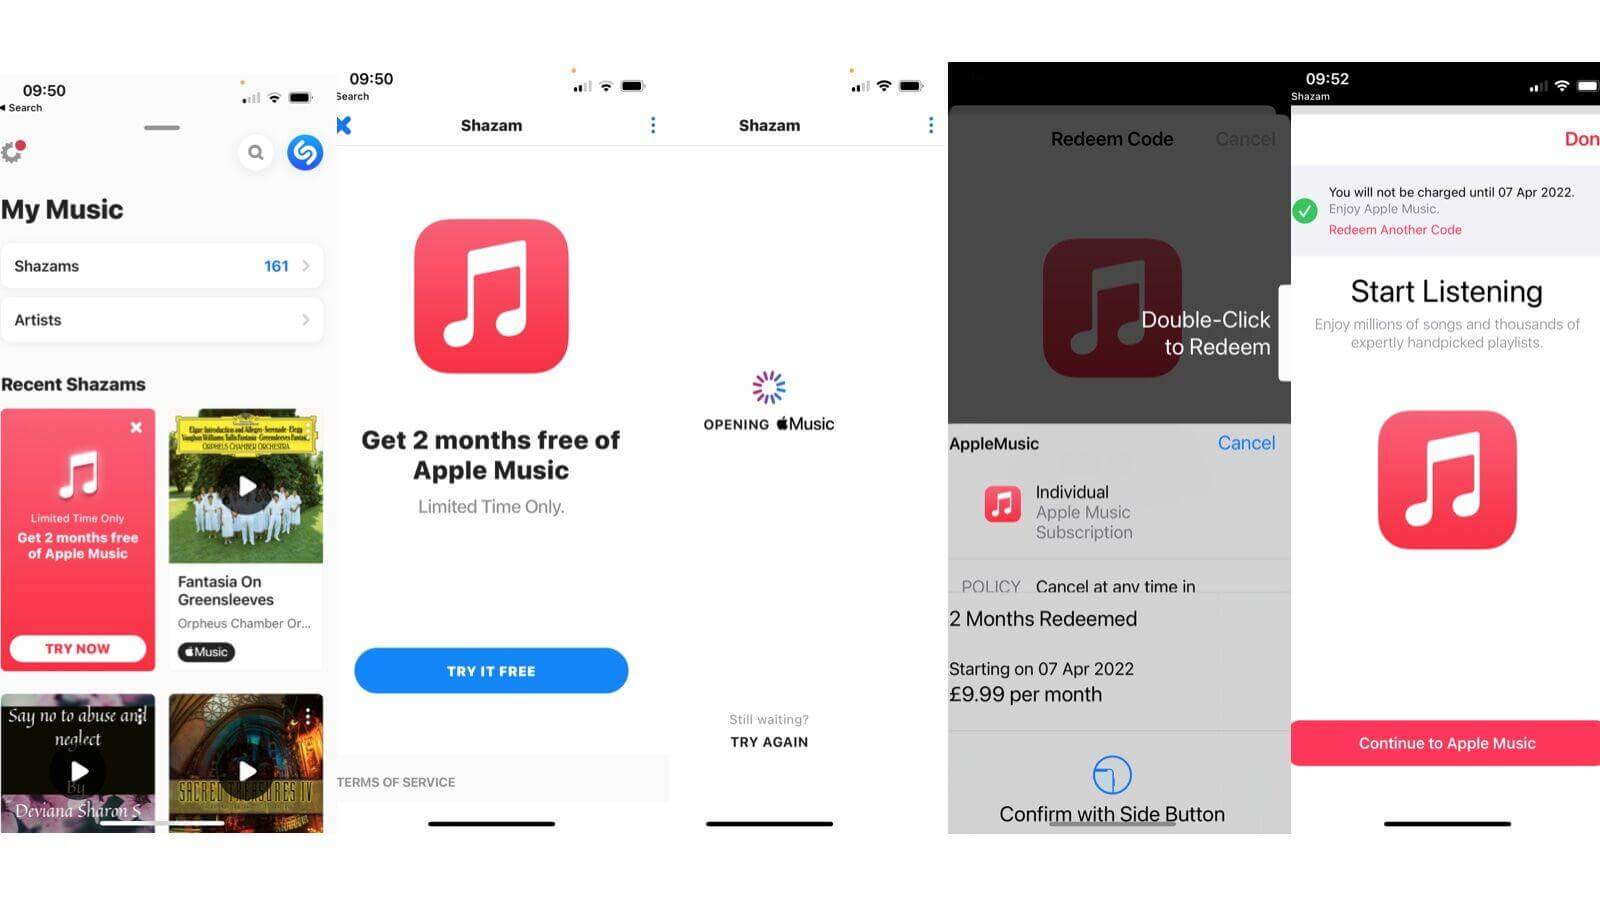
Step 1. Click on Try Now.
Step 2. You’ll be invited to Get 2 months free of Apple Music.
Step 3. Click on Try It Free and you will be taken to the Apple Music app.
Step 4. You will then be invited to Double Click to Redeem. You will see the date at which the free trial will end and you will be charged (so you can make a note to either cancel just before or switch to the Voice tier so that you don’t have to pay £10.99/$10.99).
Step 5. Finally, you are able to start listening to Apple Music.
Method 3: Via Family Sharing (3 Months)
Perhaps some of you have already used the first 1-month free trial, it's almost impossible to use Apple Music for free. But there is a way for you to get another free trial for 3 months. That's to accept the Family plan invitation. The Apple Music Family plan supports up to 6 people to share under one subscription. You can let your family member or friend subscribe to the Apple Music Family plan. And then ask them to invite you into the plan. But make sure that they have never used Apple Music before.
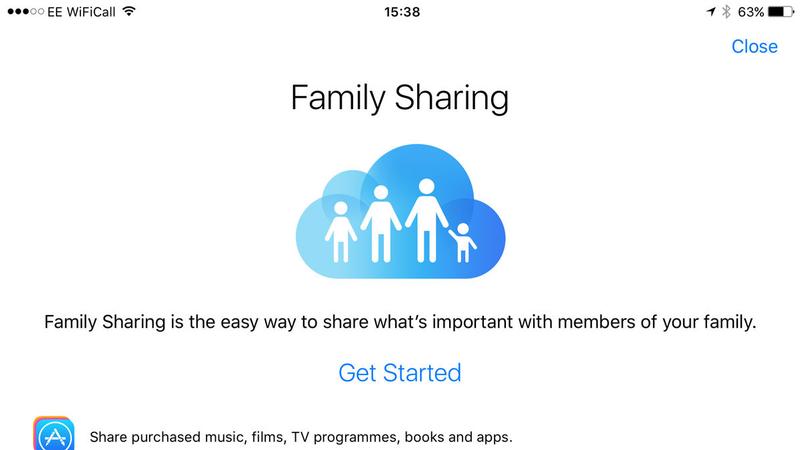
Once you get the invitation, you can accept it on your Mac or your phone. Then you need to confirm your account and choose the features for the family plan.
Method 4: Via Eligible Products (6 Months)
While Apple Music's trial period has been reduced to a month for new subscribers, there's still a way to get a six-month trial. The company bundles the extended trial period with selected AirPods, HomePod mini, or Beats products. Here are the simple steps as follows.
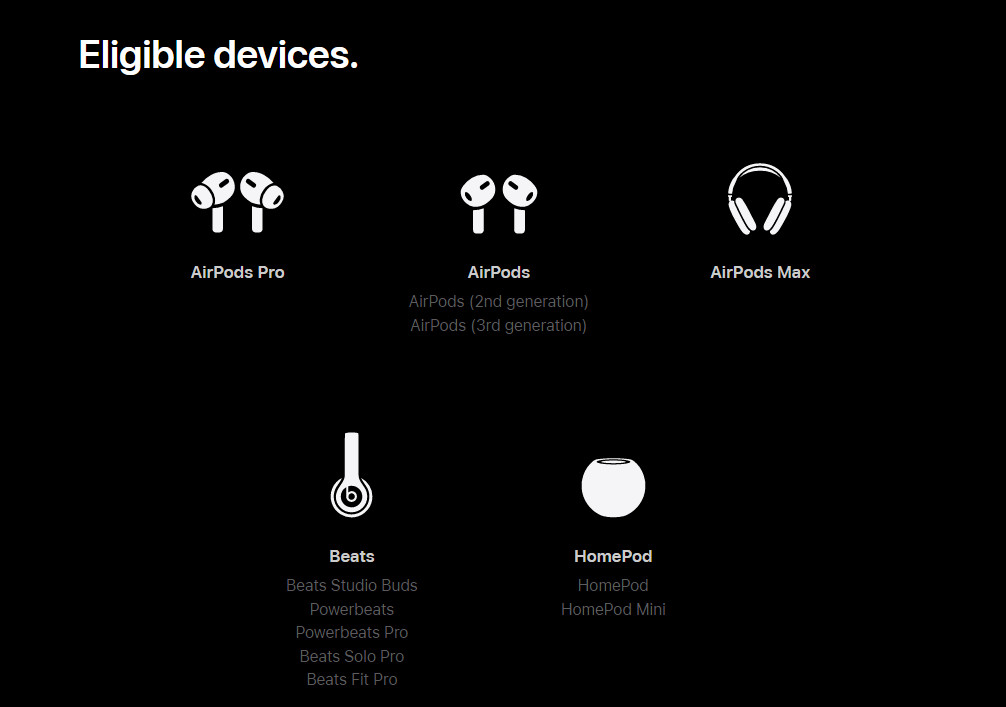
Step 1. Make sure your iPhone or iPad is running the latest version of iOS or iPadOS.
Step 2. Pair your eligible audio device with your iPhone or iPad.
Step 3. Open the Apple Music app on your iPhone or iPad and sign in with your Apple ID. If the offer doesn't appear immediately after launching the app, go to the Listen Now tab where it will appear.
Step 4. Tap Get 6 months free.
Step 5. Finally, you are able to start listening to Apple Music.
Method 5: Via Professional Tool (Permanently)
However, there is a cruel reality you should know that you can't permanently own Apple music songs even if you have already downloaded them. Once the free trial ends and you don’t renew it, all songs that you previously saved from the Apple Music catalog will be removed from your devices. Basically, you cannot stream any Apple Music tracks added to your iCloud Music Library anymore. It will be a huge loss, right? So if you want to keep Apple Music free forever even canceling your subscription, a feasible tool is recommended to help you prepare for it.
Tool Required – NoteCable Apple Music Converter
NoteCable Atunes Music Converter is a specially designed program used for downloading Apple Music tracks. With the assistance of it, you can convert songs from protected format to some popular audio formats such as MP3, AAC, WAV, AIFF, ALAC or FLAC for further editing, backup, or playback without the need to use an authorized Apple device.
Moreover, it will keep the original audio quality and metadata after conversion. You will not lose any important information about your songs, such as the artist's name, song title, or album artwork. It is 100% clean & safe with stable performance. All tracks downloaded with NoteCable are available for lifetime streaming and are playable without any restriction. Plus, it requires no need to install any extra app.
 If you need a solution for converting songs, albums or playlists from any streaming platforms (such as Spotify, Apple Music, Tidal, Amazon Music, Deezer, YouTube, YouTube Music, SoundCloud, DailyMotion, and more) to MP3 format, All-In-One Music Converter is the perfect choice.
Tutorials:
Please follow the step-by-step tutorial below to learn how to save Apple Music songs to your computer in plain audio formats.
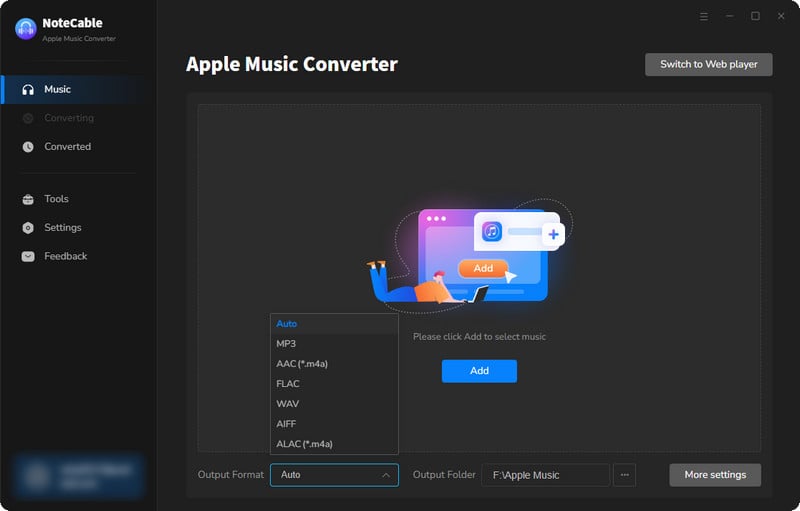
Step 2:Go to Settings, and set the parameter as your preference.

Step 3Simply click the blue Add button on the main interface to add songs from Apple Music to NoteCable.
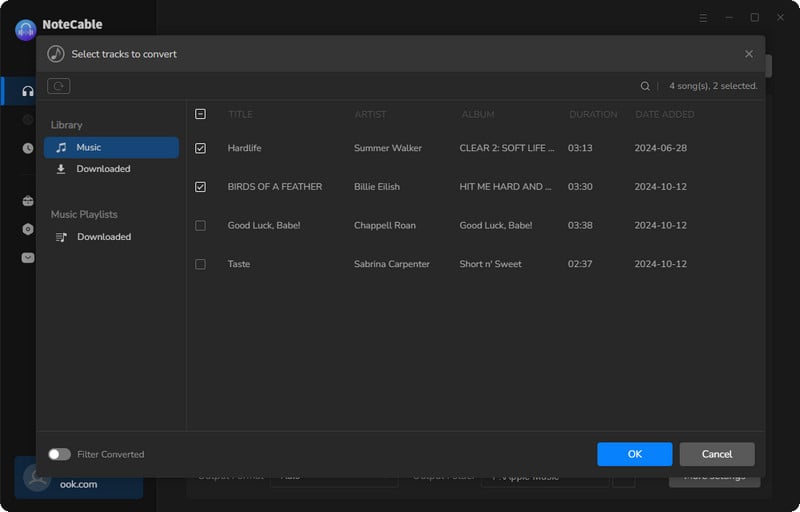
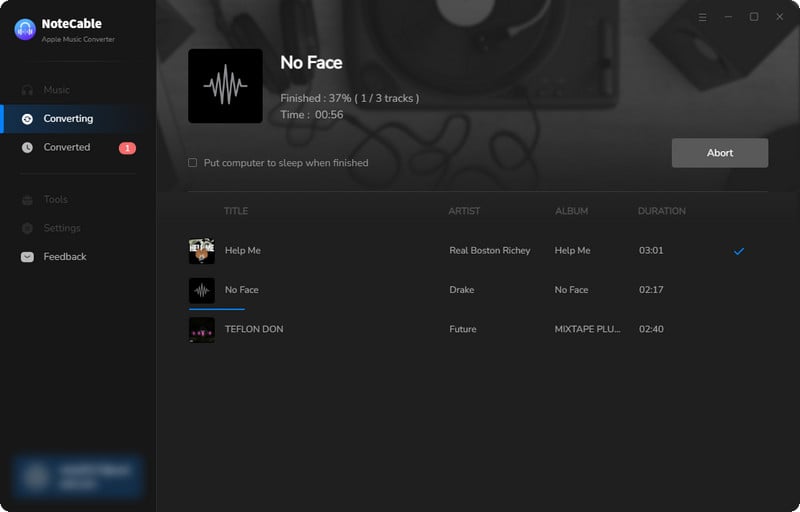
Step 4After completing the song selection, click the Convert button and the download will begin.
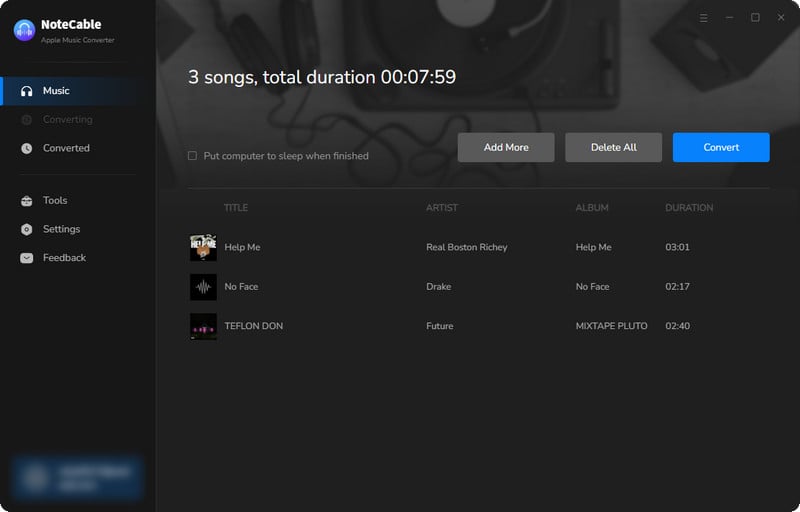
This process may take some time, please be patient.
Step 5Once all is done, you can view the downloaded songs in the "History". If you want to find the specific location, just hit the folder icon on the right side of the title.
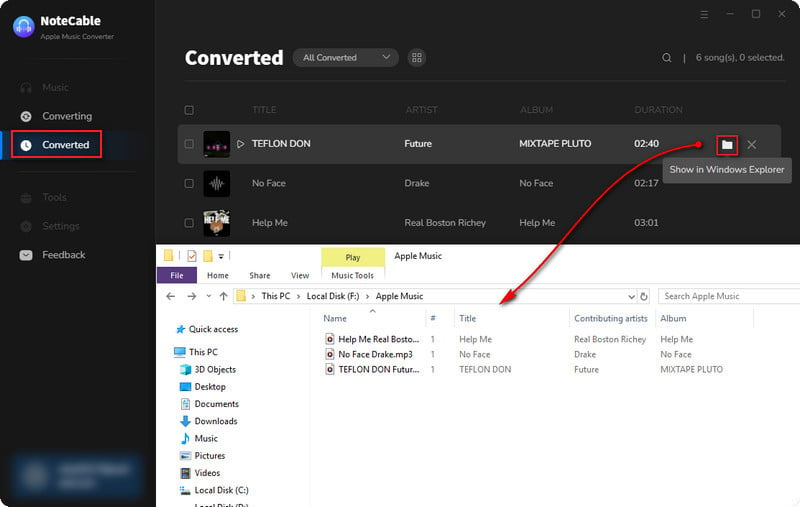
Now that the Apple Music files have been successfully saved to your computer, you can upload them to any device you like.
💡Tips: Transfer Downloaded Apple Music to Mobile Phone
By downloading Apple Music on your computer, you won't worry about whether to pay for an Apple Music subscription anymore. You can cancel it at any time but still, listen to Apple Music offline on all devices. So in the following part, we will teach you how to get free Apple Music on iPhone/Android.
Since you have used NoteCable to remove encryption from Apple Music songs and save them as local music files on the computer, what you need to do is sync Apple Music downloads from your computer to mobile devices. After finishing it, you can listen to Apple Music for free on your iOS and Android smartphones. Here are the detailed steps.
Step 1. Please connect your Android or iOS device to your computer via the USB cable or the WiFi connection.
Step 2. Locate and open the converted Apple Music folder on your computer. For iPhone users, please open the iTunes or Music app also on your desktop.
Step 3. You can drag and drop Apple Music downloads to the folder of your Android phone. Or you should transfer them to iTunes or Music app. After that, you will get Apple Music free on your Android or iPhone.
Summary
We discussed five ways to get Apple Music for free. You can start your free trial now on your computer and mobile device. But if you want to get free Apple Music forever after the free trial ends or not renew your plan, the best way is to take the help of NoteCable Atunes Music Converter. You can use it to download all your songs and get Apple Music free forever with a trial account. Give it a try!


