Home > Apple Music Tips > Get Apple Music Student Discount
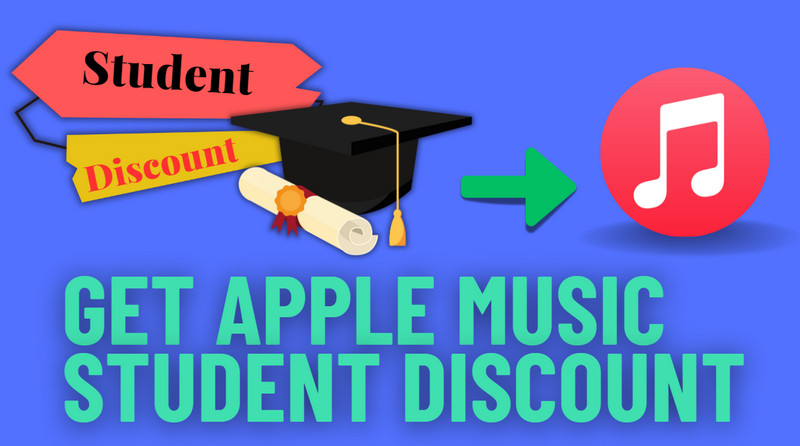
How to Get Apple Music Student Discount
Students enrolled at degree-granting institutions and universities can subscribe to Apple Music for up to 48 months at a reduced monthly fee of $4.99 per month. This kind of subscription benefits a lot to those students who are interested in music but can’t afford too much. In this article, we'll show you how to get Apple Music student discount and recommend an efficient way to save Apple Music as MP3 files with your Student subscription.
Part 1: How to Get a 30-day Free Trial of Apple Music with Student Identification
Before you pay for the Student Subscription, Apple Music provides students with a 30-day free trial to experience the wonderful music streaming service. It is very easy to get this 30-day free trial. Follow the steps below, and you can get this free trail.
Step 1Install and open the Apple Music application.
Step 2Click Log in in the upper right corner.
Step 3Click Free Trial in the bottom right corner.
Step 4Follow the process of the opening page, and you can get this free trial.
Part 2: How to Change your subscription to a Student Membership
If you didn’t reach the requirement of a Student Subscription, and you have paid for a subscription before, now you become a college student and want to change your subscription to Student Subscription. Here are the tips for you to activate your Student identification and change your subscription to Student Subscription.
Step 1Open the Apple Music app or iTunes.
Step 2Go to Listen Now or For You.
Step 3Tap or click the trial offer (one trial per person or family).
Step 4Choose Student, then tap or click Verify Eligibility.
You'll be directed to the UNiDAYS website, where you'll need to confirm your enrollment by following the on-screen instructions. You'll be taken back to the Apple Music app or iTunes after UNiDAYS confirms that you are a student.
Step 5 Use the password and Apple ID you use to make purchases to log in. Choose Create New Apple ID, then proceed if you don't already have one. We can assist you in determining whether you have an Apple ID if you are unsure.
Step 6Confirm your billing information and add a valid payment method.
Step 7Tap or click Join.
Part 3: How to Reverify Your Student Status
You'll get a notice asking you to confirm your student status in the Apple Music app or iTunes near the end of each year that you have an Apple Music student subscription. With the Settings app on your iPhone, iPad, or iPod touch, you may also check your status as a student at any time.
In the Apple Music app or iTunes for Windows
If you see a message that asks you to verify your student status:
Step 1Tap or click Verify Eligibility.
Step 2Tap or click Go to Website.
Step 3Sign in to your institution's portal.
After you sign in to your institution's portal, you’ll be directed back to Apple Music and see a confirmation screen.
In Settings on your iPhone, iPad, or iPod touch
Step 1Go to Settings > [your name], then tap Subscriptions.
Step 2Apple Music Membership.
Step 3Verify your student status. You'll be redirected to the UNiDAYS website.
Follow the prompts to verify your eligibility. If the verification is successful, you'll automatically return to Apple Music and continue your Apple Music student subscription.
Part 4: How to Save Your Apple Music as MP3 files with Student Subscription
It is economical to purchase a Student Subscription when you are a student. Although you are a subscriber, you can’t download Apple Music on your devices to keep or share. What’s more, if you lose your identification as a student, you will turn to purchase an individual subscription, which costs much more than a student subscription. Moreover, you can’t listen to music offline after the subscription expires, and can’t download your songs as specific formats. To save and enjoy the features of Apple Music, it'll be a good way for you to save Apple Music as MP3 files.
NoteCable Atunes Music Converter is specially designed to record tracks from Apple Music and convert them to MP3/AAC/WAV/FLAC/AIFF/ALAC for offline playback. Once songs are downloaded to plain format files, you can play songs via any MP3 player, or transfer them to USB flash drive , and move them to any device for normal playback.
NoteCable Atunes Music Converter
 If you need a solution for converting songs, albums or playlists from any streaming platforms (such as Spotify, Apple Music, Tidal, Amazon Music, Deezer, YouTube, YouTube Music, SoundCloud, DailyMotion, and more) to MP3 format, All-In-One Music Converter is the perfect choice.
Step-by-step Tutorial: Download Apple Music as MP3 Files
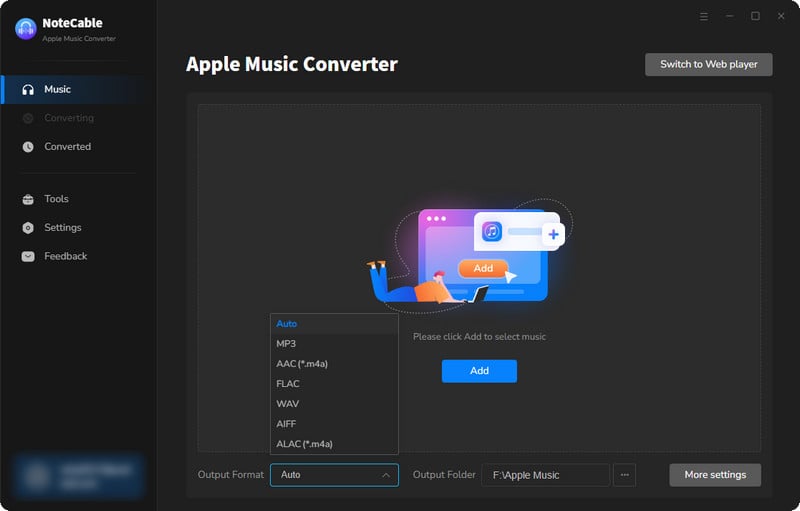
Step 2:Go to Settings, and set the output format as MP3.

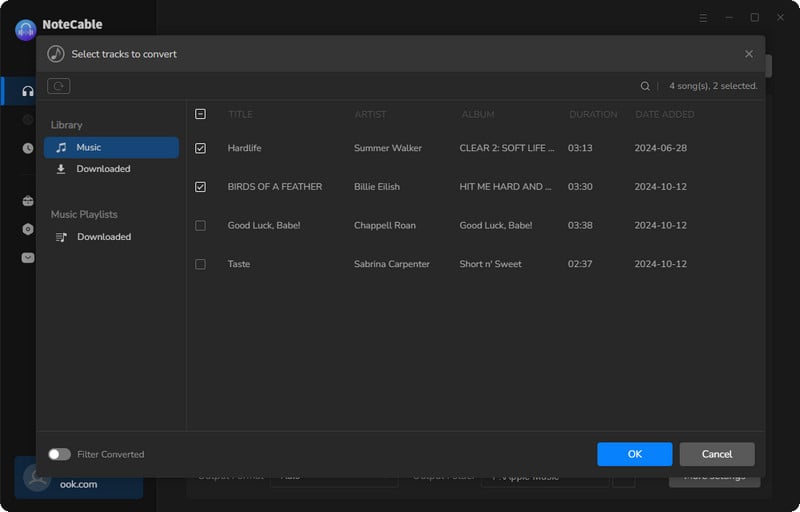
Step 3Simply click the blue Add button on the main interface to add songs from Apple Music to NoteCable.
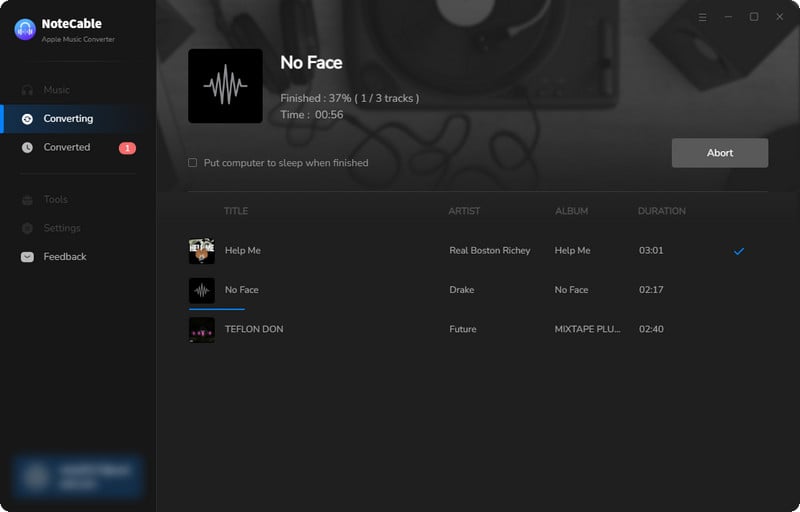
Step 4After completing the song selection, click the Convert button and the download will begin.
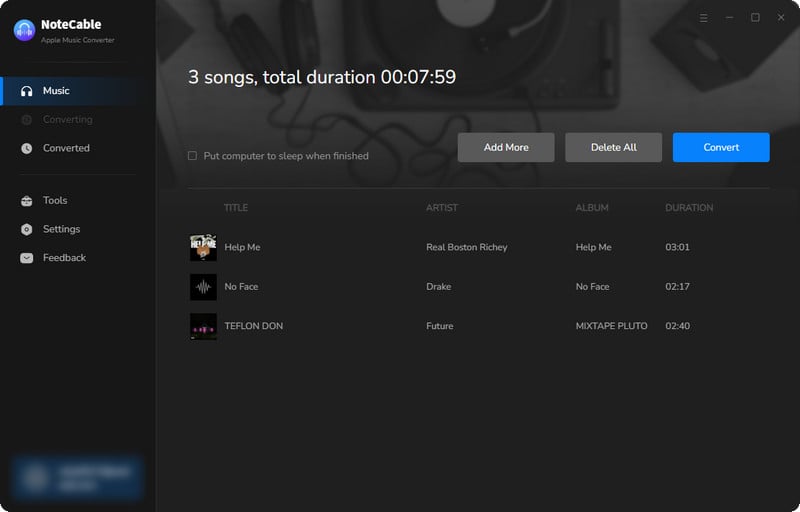
This process may take some time, please be patient.
Step 5Once all is done, you can view the MP3 downloaded songs in the "Converted". If you want to find the specific location, just hit the folder icon on the right side of the title.
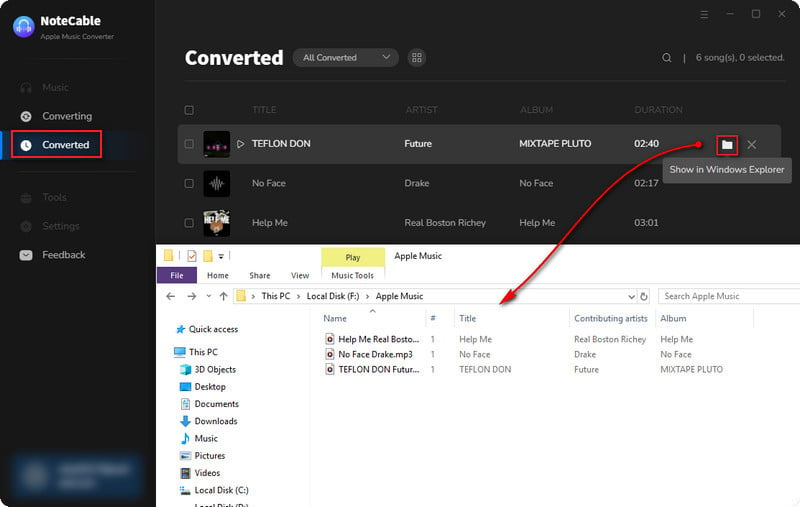
Finally, you can save your MP3 files forever and even you can transfer them onto your devices to listen to them offline without any limitations.
Summary
In conclusion, by following the steps outlined in this guide, you can not only enjoy Apple Music student discount with your student identification but also maximize your music experience by saving your Apple Music as MP3 files. With the ability to download and convert your favorite songs into a universally compatible format, you can build a personal music library that can be enjoyed offline, without any limitations. Go and catch your discount!

Emma Wouters
Emma Wouters is a skilled writer who specializes in digital music streaming. She's an expert on music platforms and offers easy-to-understand advice on various tools.