Home > Apple Music Tips > Set a Sleep Timer for Apple Music
How to Set a Sleep Timer for Apple Music
Finding the perfect late night playlist can help induce calming relaxation before going to bed, but what do you do when your music keeps playing after you've fallen asleep? Most people likely fumble around in the dark with their phone to find the "stop playing" button, resulting in an unnecessarily disrupted sleep cycle.
If this sounds familiar, Apple Music has a great solution for setting timed sleep settings on your favorite playlists and radio stations — no more waking up at three am! In this article, we will be covering how to set an Apple Music's Sleep Timer on different devices so that you can enjoy a restful night without any interruptions
Part 1: Set a Sleep Timer for Apple Music on iPhone & iPad
There is no direct sleep timer on Apple Music, but on iPhone and iPad, there is a Clock app for you to set your sleep timer for Apple Music. Following the steps to set your sleep timer for Apple Music on your iOS devices:
Step 1: Open Apple Music and start listening to the music you wish to sleep to.
Step 2: Launch the clock app, then select "Timer" from the bottom menu.
Step 3: Decide on the time for the duration of the music playback.
Step 4: Click on "When Timer Ends" and scroll down to select "Stop Playing".
Step 5: To save your changes and go back to the timer, click "Set".
Step 6: To begin the timer, tap "Start".
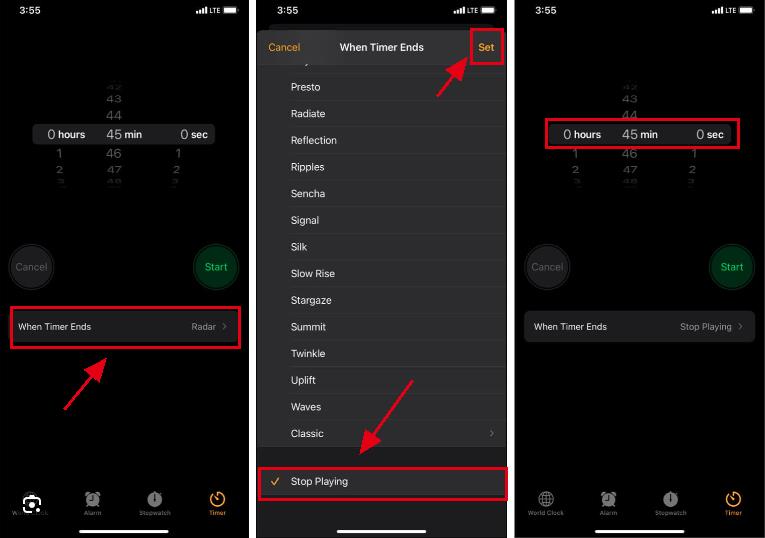
Then, you have successfully set your sleep timer for Apple Music. Apple Music will play in the duration of your sleep timer and automatically turn off. They are the same steps to set a sleep timer on your iPad.
Part 2: Set a Sleep Timer for Apple Music on Mac
On a Mac, is it possible to set a sleep timer for Apple Music? Although the Apple Music Mac app doesn't have a sleep timer, you can set one in the system preferences for Apple Music on Mac.
Step 1: Click "System Preferences" after selecting the App logo in the top left corner of your Mac.
Step 2: Choose "Battery" if you are using MacOS Big Sur. Click "Energy Saver" if you are running MacOS Catalina or an earlier version.
Step 3: Select "Schedule" and then select "Sleep" from the drop-down menu. Next, decide when you want the music to cease.
Step 4: To finish the procedure, click "OK" and you can now open Apple Music and play the music you want.
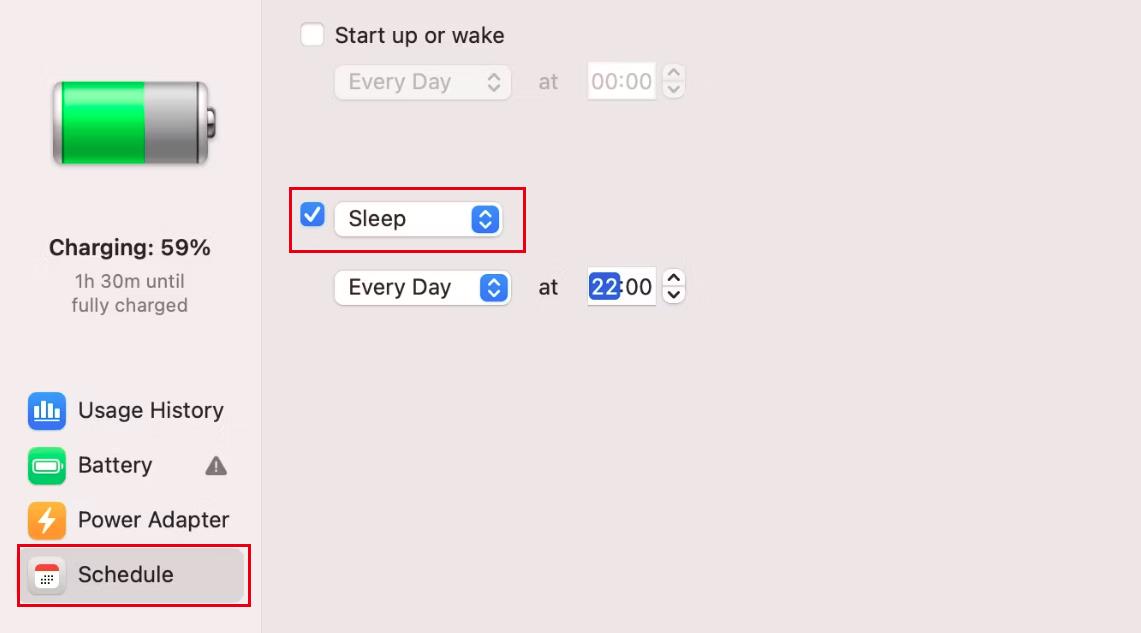
Then, you have successfully set your sleep timer for Apple Music on Mac. Apple Music will play in the duration of your sleep timer and automatically turn off.
Part 3: Set a Sleep Timer for Apple Music on Windows PC
To set a sleep timer on Windows PC for Apple Music, what you need to do is to adjust your settings on Windows PC.
Step 1: Click "Start" and then "Settings" on your Windows computer.
Step 2: Select the "System" tab.
Step 3: Click on "Power".
Step 4: You can set a duration of time in the "Screen and Sleep" section.
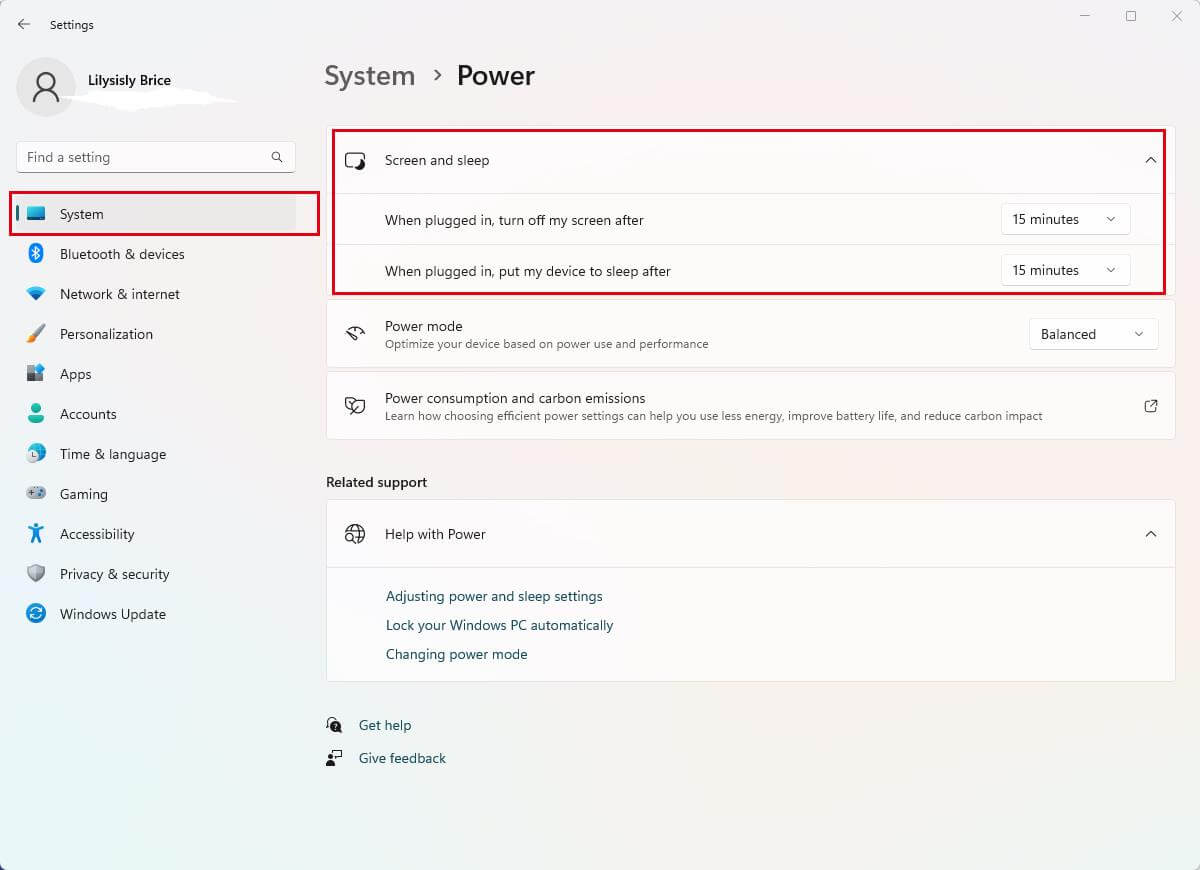
The instructions to set a sleep timer for Apple Music on a Windows computer are listed above. Your computer will go into sleep mode once the time has passed after it has been configured. Apple Music is currently playable. When the allotted time has passed, it will also automatically stop.
Extra Tip: How to Download Sleep Music from Apple Music as MP3 Files
This is an extra tip for you to download your favorite sleep songs from Apple Music as MP3 files. You can not only set them as sleep timer, but also make them accessible to every MP3 players or devices to play. It is a good choice to download your Apple Music as MP3 files and save them onto your devices forever.
After downloading your Apple Music, you can listen to Apple Music offline while you're downloading it. Apple Music can be used as an alarm clock or ringtone. You won't require data streaming to play them once you've downloaded Apple Music. Additionally, your phone's battery life will be improved.
To download Apple Music, you need a third-party tool. NoteCable Atunes Music Converter is specially designed to record tracks from Apple Music and convert them to common formats for offline playback. NoteCable enables you to download music as MP3, AAC, WAV, AIFF, ALAC or FLAC format.
Tool Required:
 If you need a solution for converting songs, albums or playlists from any streaming platforms (such as Spotify, Apple Music, Tidal, Amazon Music, Deezer, YouTube, YouTube Music, SoundCloud, DailyMotion, and more) to MP3 format, All-In-One Music Converter is the perfect choice.
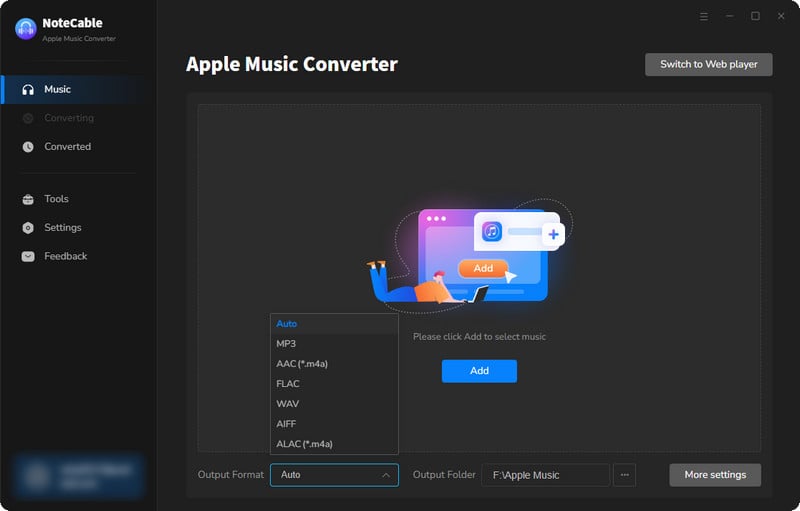
Step 2:Go to Settings, and set the output format as MP3.

Step 3Simply click the blue Add button on the main interface to add songs from Apple Music to NoteCable.
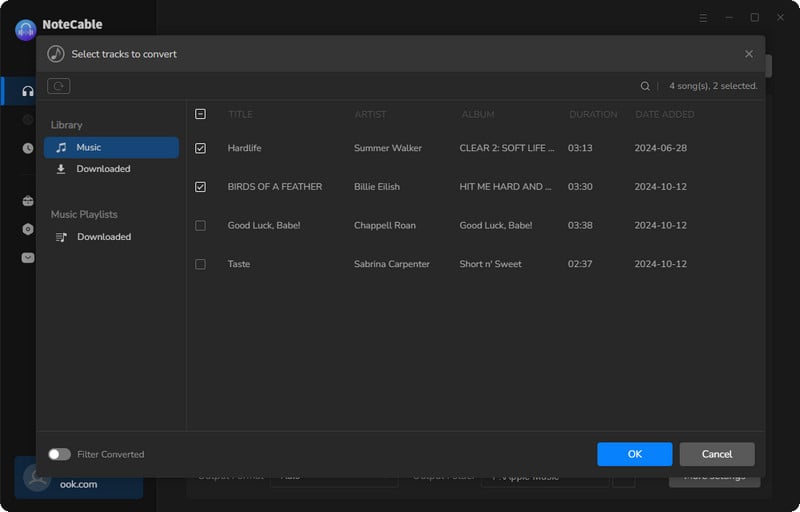
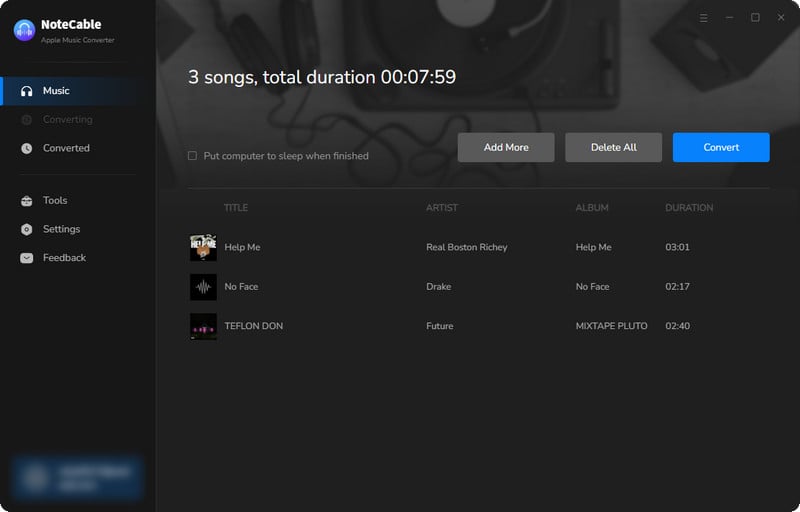
Step 4After completing the song selection, click the Convert button and the download will begin.
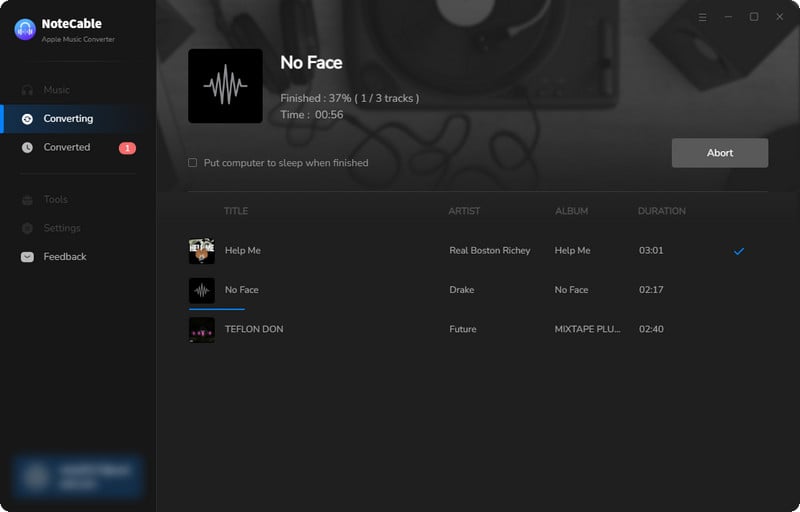
This process may take some time, please be patient.
Step 5Once all is done, you can view the MP3 downloaded songs in the "Converted". If you want to find the specific location, just hit the folder icon on the right side of the title.
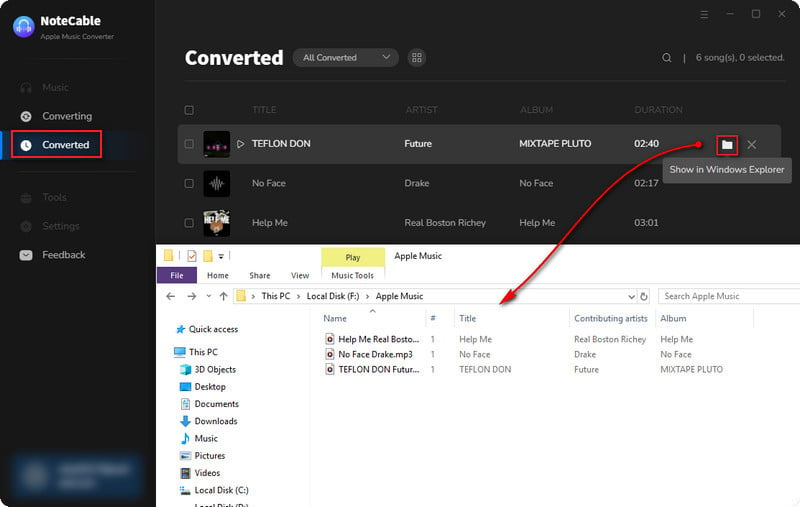
Finally, you can save your MP3 files forever and even you can transfer them onto your devices to listen to them offline without any limitations.
Summary
In conclusion, on iPhone and iPad, Apple Music has a Sleep Timer function that makes it simple for consumers to set a timer for their music playback. Mac users can customize the sleep timer in their system preferences. Clicking "Start" and "Settings" on a Windows PC will also allow customers to change Apple Music's settings. As a further advantage, you may download songs with NoteCable Atunes Music Converter, and convert them to MP3 and other popular formats for offline listening.


