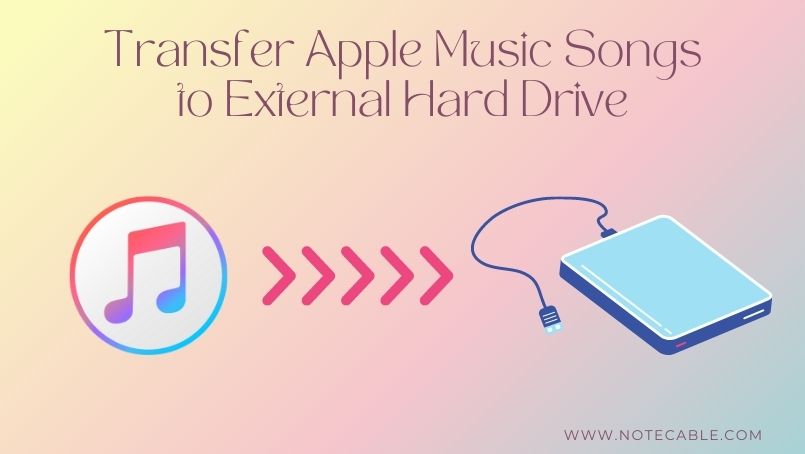
Home > Apple Music Tips > Transfer Apple Music Songs to External Hard Drive
How to Transfer Apple Music Songs to External Hard Drive
Apple Music, released in 2015, is one of the most popular music streaming platforms in the world. With Apple Music, people can enjoy music on iPhone, Android phone, computer, smartwatch, HomePod, etc., which is really convenient. To get the full service of Apple Music, you need to pay a monthly fee. Then, you can listen to music, download music to your local devices, and enjoy the personalized service on Apple Music.
Apple Music currently has over 100 million songs, and many consumers want to keep Apple Music songs as collections on their local devices. If you want to transfer Apple Music tracks to an external hard drive, then follow this article, we will show you how to do it.
Part 1. How to Find Downloaded Apple Music Files on A Computer
To find and transfer the downloaded Apple Music files to the external hard drive, the first thing you need to do is to find where your Apple Music files are stored. Here is the way to find Apple Music files on computer:
For Windows users:
Step 1 Open iTunes on your computer.
Step 2 Click "Edit > Preferences", then choose "Advanced". You can find and change the output path there.
For Mac users:
By default, your music is saved in the following directory: Home/Music/
If you changed the path before, then you can check it by opening the Music app, then clicking "Music > Preferences > Files".
After that, you can just copy & paste Apple Music audio files to your external hard drive.
However, you need to know that the Apple Music files that you downloaded in this way are all protected. Although you can transfer them to your external hard drive, you can’t play them on unauthorized software or devices. Is there any way that could help users convert Apple Music songs to unprotected format? Read on, we will show you the method.
Part 2. Download & Transfer Apple Music Songs to External Hard Drive
To download Apple Music to plain audio format, you need a third-party tool, like NoteCable Apple Music Converter.
NoteCable Apple Music Converter is a simple yet effective downloader for Apple Music users to get songs from Apple Music web player and save them as local files on MP3, AAC, FLAC, WAV, ALAC or AIFF. After conversion, it can preserve the high audio quality and ID3 tags like artist, album, track number, etc. With just a few clicks, you can download Apple Music to your computer easily.
The following is a tutorial about how to use NoteCable Apple Music Converter, and how to transfer Apple Music to the external hard drive.
NoteCable Apple Music Converter
 If you need a solution for converting songs, albums or playlists from any streaming platforms (such as Spotify, Apple Music, Tidal, Amazon Music, Deezer, YouTube, YouTube Music, SoundCloud, DailyMotion, and more) to MP3 format, All-In-One Music Converter is the perfect choice.
Download and Save Apple Music to External Hard Drive
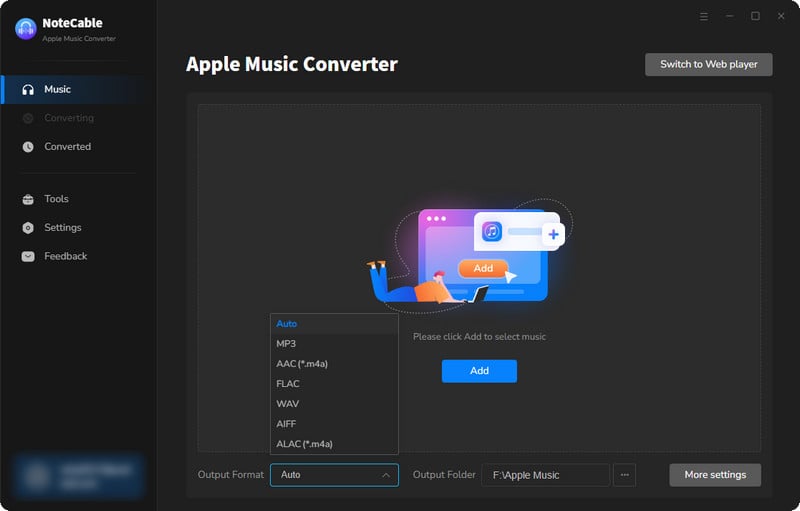
Step 2:Go to Settings, and set the parameter as your preference.

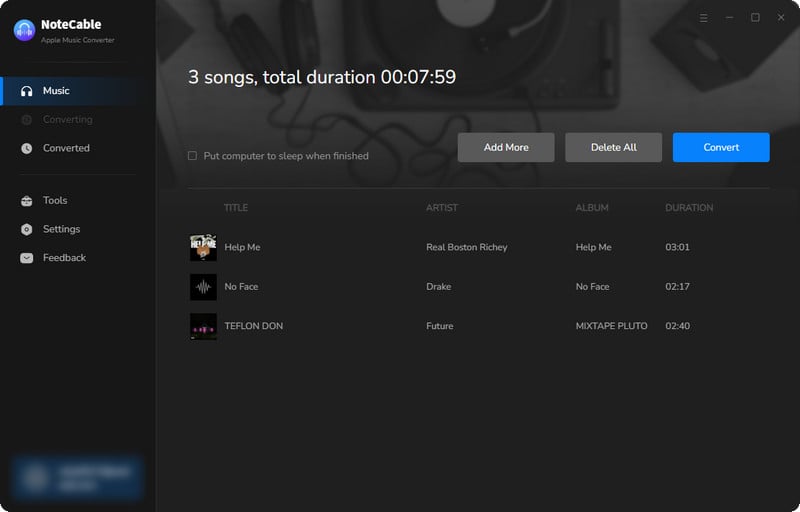
Step 3Simply click the blue Add button on the main interface to add songs from Apple Music to NoteCable.
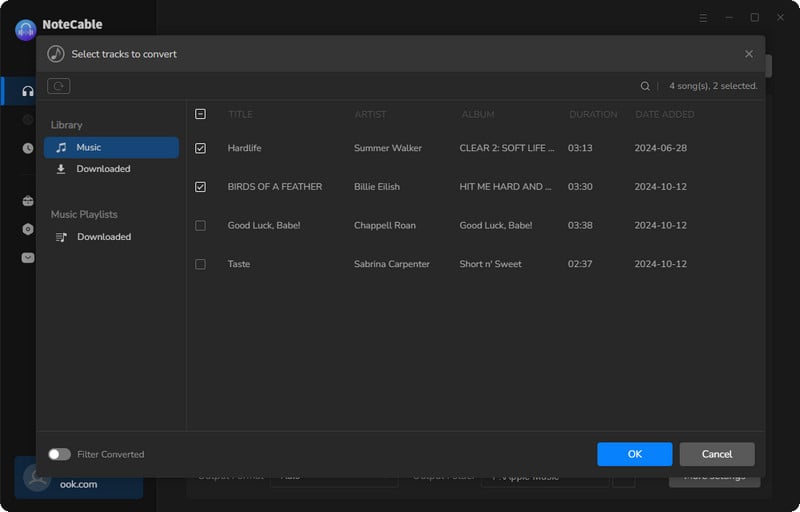
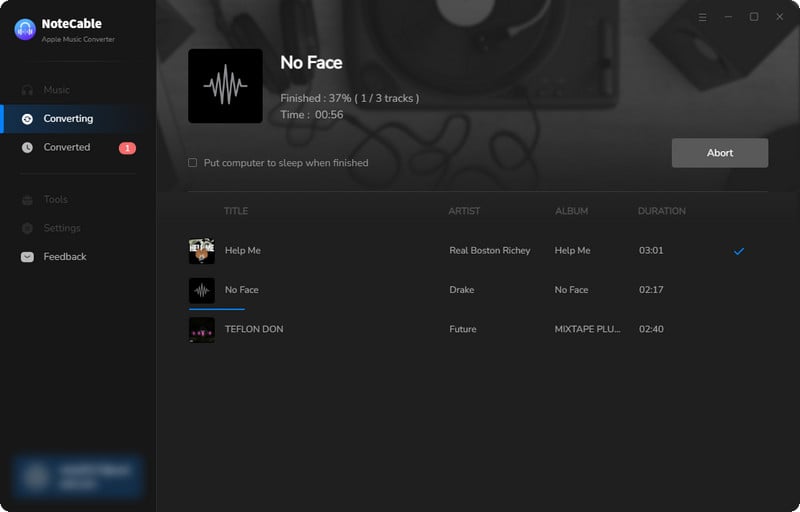
Step 4After completing the song selection, click the Convert button and the download will begin.
This process may take some time, please be patient.
Step 5Once all is done, you can view the downloaded songs in the "History". If you want to find the specific location, just hit the folder icon on the right side of the title.
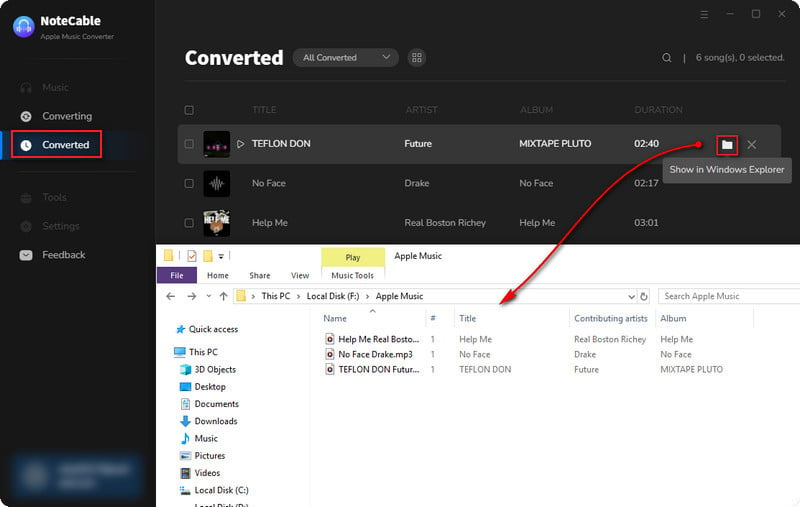
Now that the Apple Music files have been successfully saved to your computer, you can upload them to any device you like.
Summary
You can’t miss NoteCable Apple Music Converter, which can download Apple Music songs in different formats from the web player, and let you keep converted Apple Music songs forever. Just install NoteCable on your computer, then you can download the playlist, and transfer converted Apple Music songs to external hard drive.

Emma Wouters
Emma Wouters is a skilled writer who specializes in digital music streaming. She's an expert on music platforms and offers easy-to-understand advice on various tools.